Showing posts with label easy crafts. Show all posts

Thursday, September 5, 2024

Easy Plastic Pumpkin Pail Crafts


Now that Spooky Season is here, plastic pumpkins are available for not only Trick or Treating, but also for crafting. 


I bought four plastic pumpkin pails, and used them in different ways to decorate our front porch. 


** This post also contains affiliate links and I will be compensated if you make a purchase after clicking on my links.

The first pumpkin craft I made was the sitting pumpkin witch. I found the supplies I needed from the Dollar Tree. You will need two sets of witch legs, and a witch hat.  I found everything for $1.25 each.  


One set of the witch legs will be used for the pumpkin's legs. I filled them with a plastic bag to give them a little bit of dimension. 


Since they do not sell witch arms, I had to alter the second set of witch legs.  I cut out the shape of mitten out of the felt shoes, so it looked like the picture above. 


I also filled the arms with plastic bags to give them dimension as well. I attached both the arms and legs to the pumpkin with hot glue.  


 The last step was to remove the plastic handle and glue on the witch hat. I only glued it about 2/3 of the way around though, because you want some space to add a tea light or push light. Both types of lights are available the Dollar Tree. 


A very simple way to add some Halloween fun to your porch is by making a Halloween lantern.  Dollar Tree has planter chains near their floral section for $1.25.  I am not sure if they are available all year or if they are seasonal.


We hung this pumpkin on the front of our porch and added a Dollar Tree Strobe light that changes colors.


I don't have a good picture of pumpkin we placed around the light fixture on our porch. First we cut off the handle, then cut down the back of the pumpkin.  Depending on the size if the light fixture you will need to remove the bottom of the pumpkin and some of the back so that it fits around your light fixture. 


The last pumpkin craft that I made is to make a pumpkin head candlestick.  I found a black pillar candlestick  at the Dollar Tree and glue it to the bottom of the pumpkin.  I also added a gem spider from the Halloween party section. 


If you order from DollarTree.com, they are offering Free Shipping up to $50 through Sept 7th with the code FREESHIP.   If available you can also have items shipped free to your local store!

Happy Crafting! 


Read More »

Wednesday, October 4, 2023

Chip Can Scarecrow


I was going through some old photos the other day, and came across one of my favorite fall crafts I made some time ago. You do not need a lot of supplies to make this scarecrow, just some paper, raffia, and adhesive of some kind.   


I color blocked the paper onto the can for the face, shirt and pants.  


I drew on the face with markers, and used a scrap of paper for the nose.  I added small white dot to the eyes after I took the picture.  


I then added some marker details to the shirt and pants. I used two thing scraps of blue paper for the overall straps, and a scrap of orange for his patch. 


The arms are made from a strip of paper about three to four inches long, and the whatever width you prefer.   Fold the paper about an inch on one side and attach it to the body. 


Add raffia to the head and arms 

The hardest part of the scarecrow is to make the hat Ball up a piece of a paper and tape it to the top of the head.  It will give the hat shape and dimension.  


Cut a circle out of thin brown paper big enough to make the hat.  If you don't have thin paper, a paper lunch sack will work well.  Have someone hold the paper in place while a piece of string is tied around the hat, to give the hat shape. 


Trim the string if needed.  


Fold the paper hat up around the string to make the brim. 


I found a cute sunflower sticker and added it to the hat, and he was finished.  I love how cute he looks sitting out during the fall.    


Read More »

Wednesday, August 30, 2023

Easy Halloween Gnome DIY


Gnomes can be very easy, and inexpensive to make, and there are a lot of different ways you can make a gnome. The way I am going to show you today, all you will need is a few items from the Dollar Tree and a glue gun. 

Another thing nice about this craft is you can easily change out the gnome hat for each holiday or season with different fabric.  I used Halloween fabric for this tutorial, but Dollar Tree has so many cute patterns available throughout the entire year.  


** This post also contains affiliate links and I will be compensated if you make a purchase after clicking on my links

The items you will need are: 

  • Dollar Tree styrofoam craft pumpkin  - they are  available in orange, white and black in store and online.  You can currently buy the orange and white pumpkin in smaller quantities of only 4 on their website.  Another cool thing is when you order online, you can often have your order shipped free to your local store.

string mop head
  • Crafters Square fabric cuts -  you probably wont need to buy this in bulk, but you can see some of the fun Halloween prints available this year with the link.

  • wooden beads - Dollar Tree has beads available in all shapes in sizes that would be great for gnome noses. 


The first thing I like to start with when making my gnomes is the beard.  You will need to pull out 16 strands from the mop and lay them on a flat surface, 


Cut each strand in four pieces.  The easiest way to do that evenly is to cut the strand in half, and then cut each half into half.  You should end up with 64 pieces each about 4 inches long. 


With your glue gun start gluing the pieces at the top of the pumpkin. The strands will be longer than the pumpkin. Glue them as close together as you can if you do not want the pumpkin to show underneath. 


Continue gluing on strands until they cover the half of the pumpkin.  


After you have all the strands attached to the pumpkin, the next step is to pull out the stem.  The reason why you want to remove the stem is so the cone will lay flat on the pumpkin in the next step.


Glue the cones on the top of the pumpkins. 


 After the cone is in place it is time to make the hat.  Fold the fabric into a triangle shape, and cut to the size you would like for your gnome.  The smaller the triangle, the smaller the hat.  I made mine a little bit on the bigger side.  


With  the right side of the fabric on the inside, glue the edges of the flat side of the triangle together.  (you can also sew this edge if you do not want to use glue). Once the glue has cooled, turn the fabric right side out.  


Place the hat over the cone and adjust it so it looks something like this.  You can glue the hat in place, but if you plan on changing out the hat for different seasons, you may want to use a small push pins to hold it place. Once you have the hat in place, glue on the nose.    I named this gnome Trick because I used the fabric with scary jack-o-lanterns. 


I named this gnome Treat because of the candy corn on his hat. 


Trick and Treat 


Read More »

Monday, January 23, 2023

How to make easy faux ice cream


Making faux ice cream for the craft class I taught, has to be one of my favorite new things to craft. Not only was it simple to make, it was made using Dollar Tree products.  

** This post also contains affiliate links and I will be compensated if you make a purchase after clicking on my links.


Items I used to make the ice cream 


Craft Smart Acyrlic Paint in Brown and Pink Blast 


Good Cook Ice Cream Scoop   (I liked this kind because it made the scoops more uniform in shape) 


I mixed the spackle, and just a teeny bit of water in a plastic container.  As you stir it, it becomes the consistency of ice cream.  


Using an ice cream scoop with a spring handle makes the prettiest ice cream.  If you don't like how one turns out, that's okay, you can put it back in the bowl re-scoop it. The scoop in the bottom left has a little bit more water mixed in, which made it have a softer look. Place the scoops on a piece of wax paper to dry.   I was able to make 3 scoops from one small container of spackle. 


There are two ways you can make the colored ice cream.  You can mix the paint into the spackle, or you can paint them when they are dry which is what I did.  I mixed the brown and the pink with Dollar Tree white acrylic paint until I got the colors I liked to make the strawberry and chocolate ice cream. 


 Just a heads up, it's best to not be hungry when you are making these because they really look like real ice cream. 


When the scoops were dry I put them in a glass dessert bowl.   I think I got these at Dollar Tree awhile back, but since they no longer have the stickers on them, I am not sure.  

If desired you can add faux chocolate syrup, faux whip cream or even faux cherries from Hobby Lobby to your ice cream.   I will be making some more of ice cream treats in the near future, and  posting more faux ice cream DIYS. 


Read More »

Monday, November 21, 2022

Countdown to Thanksgiving - Easy Turkey Votive and Air Fryer Potato Skins


This sweet guy is quick and easy to make, and looks cute just about anywhere you sit him. 

*this post contains affiliate links   

To make him you will need the following items which can all be found at the Dollar Tree .

round glass bowl 

ping pong ball 

feathers 

google eyes 

felt scraps 


I used orange paint when painting the bowl and ping pong ball  instead of brown, so the light could show through the glass votive easier. 


Once the paint was dry, I hot glued the ping pong ball to the front of the glass bowl, and feathers in the shape of a turkey tale to the back.  Then then added the eyes and felt to the ping pong ball to make the turkey's face.  

In the bowl I used a battery tea light. I am not sure how an actual candle would do with the acrylic paint.  


My turkey greeted our guests on the bathroom counter near a fall flower bouquet. 


To make this easy appetizer or side dish,  you will need some potatoes, cheese, bacon, and any other fixings you like to add. 


While this is not the exact air fryer I have, this Kalorik 3.5 qt it is  the same brand and size. It has good ratings and as they time of this post is on sale.  


To make my potato skins I started with six potatoes that will make 12 potato skins.  I bake mine in the microwave, but you can bake them anyway you prefer. 


I sliced the potatoes the long way and scoop out some of the potato filling and place it in a large bowl. 


I split the potatoes into two batches, since they wouldn't all fit in my air fryer. I baked them for 3-4 minutes at 390 degrees.  This was to crisp the outer skin just a bit before filling them.  


While the skins were crisping, I mixed up the filling.  We keep our potatoes pretty simple. In the bowl on top of the potato is six pieces of bacon broken in a pieces, shredded cheddar cheese, and salt and pepper. 


I then filled the skins and placed them back in the air fryer for five more minutes.  After they baked those five minutes, to  make them extra cheesy, I added sprinkled more cheese on top and let that melt for one  more minute.  


The finished potatoes are so good, and don't last long!  


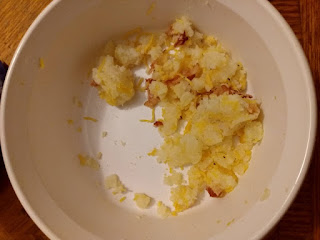
BONUS TIP  If you have any potato filling left over, just mix it with scrambled eggs the next morning for a filling breakfast. 


Today's Shopping Tip is a fun one. If you plan on going out for Black Friday shopping on Friday morning, you might want to make Kohls one of your first stops.  The first 200 people who enter the stores will be part of their TGIBF Sweepstakes.  Everyone of 18 years old will be given a game piece with the possibility to win over a million dollars in prizes.  The big prize is a trip to Legoland, but they are also giving away gift cards, appliances and Kohls cash. Every card will win something. 

I have another easy last minute Thanksgiving recipe planned for tomorrow.  See you then.  


Read More »