Showing posts with label Halloween crafts. Show all posts

Wednesday, October 30, 2024

Last Minute Halloween Ghost Candy Basket


].


I am so excited about this easy last minute DIY. This year we have a cute ghost theme going on at our house.  I saw something similar to this candy basket ghost online and on TV.  I wanted to do but my usual spin on it, and make it completely out of Dollar Tree items. 


I decided to use two white laundry baskets, a white circle plastic tablecloth, black felt, and a  clear plastic bowl from the party section.    You can use zip ties or tape to connect the baskets with their bottoms together. 


 Once the baskets are attached, cover with the white tablecloth. 


I placed the bowl in the top basket.  This size laundry basket will hold tons of candy.  


I used the black felt to start the ghosts face. 


I used some craft foam I had on hand to finish off the ghost's face. 


I did not want to open our Halloween candy just yet, because once it is open we will be tempted to eat it. :) I filled with some Dollar Tree snacks to show how much it will actually hold.  This would be a great to hold goody bags for a kids Halloween party in addition to trick or treat night.  


I put a push light under the ghost to light him up on the porch. 


We are ready for Trick of Treat night.  The weather prediction calls for rain, let's hope it cooperates.  

Happy Halloween!
Read More »

Thursday, October 3, 2024

DIY a Halloween Ghost Dog


My assistant Brittany was very excited to help make her look-a-like ghost dog.  To make a ghost dog you will need a tomato cage, a rubber or Styrofoam ball, a cardboard tube, craft foam, and either a  white sheet or shower curtain.  I found a white plastic shower curtain at Dollar Tree for $1.25.  I decided to use that since the ghost dogs will be on our front porch.  


In this photo I show how a bit on what to do, and what not to do. I first placed a rubber ball on the very top of the tomato cage, but that made the dog taller than I wanted to be.  Also if you plan to light up your dog it's not the best idea to use a red ball. (I will show you why later in the post.  :) I decided that I had to adjust the size of the tomato cage.


I could not find my picture of what the tomato cage and ball should look like when I was making the dogs, so I took a picture under my finished dog today.   D helped me fold down the top part of the tomato cage.  When we are done with Halloween, the cage can be used again.  After doing this, the ball fit snuggly on the top of the tomato cage.  I used a combination of hot glue and duct tape to attach the cardboard tube to the ball to make the snout.  


I covered the tomato cage with the white shower curtain. I then made eyes and noses out of craft foam.  My golden's ears are made with tan craft foam, my black lab has black felt ears.  


I found some white trick or treat pumpkins at Walmart the other day, and thought they would look cute with the dogs.  I plan place tea lights in them so they light up at night. 


Remember when I said it is not the best idea to use a red ball.  When the dogs are lit up at night, my lab's brains glow red.  LOL!   Oh well, I think it looks kind of cute, like she is a zombie ghost dog. 

Watch for more easy and fun Halloween decor ideas to be posted soon.  


Read More »

Thursday, September 5, 2024

Easy Plastic Pumpkin Pail Crafts


Now that Spooky Season is here, plastic pumpkins are available for not only Trick or Treating, but also for crafting. 


I bought four plastic pumpkin pails, and used them in different ways to decorate our front porch. 


** This post also contains affiliate links and I will be compensated if you make a purchase after clicking on my links.

The first pumpkin craft I made was the sitting pumpkin witch. I found the supplies I needed from the Dollar Tree. You will need two sets of witch legs, and a witch hat.  I found everything for $1.25 each.  


One set of the witch legs will be used for the pumpkin's legs. I filled them with a plastic bag to give them a little bit of dimension. 


Since they do not sell witch arms, I had to alter the second set of witch legs.  I cut out the shape of mitten out of the felt shoes, so it looked like the picture above. 


I also filled the arms with plastic bags to give them dimension as well. I attached both the arms and legs to the pumpkin with hot glue.  


 The last step was to remove the plastic handle and glue on the witch hat. I only glued it about 2/3 of the way around though, because you want some space to add a tea light or push light. Both types of lights are available the Dollar Tree. 


A very simple way to add some Halloween fun to your porch is by making a Halloween lantern.  Dollar Tree has planter chains near their floral section for $1.25.  I am not sure if they are available all year or if they are seasonal.


We hung this pumpkin on the front of our porch and added a Dollar Tree Strobe light that changes colors.


I don't have a good picture of pumpkin we placed around the light fixture on our porch. First we cut off the handle, then cut down the back of the pumpkin.  Depending on the size if the light fixture you will need to remove the bottom of the pumpkin and some of the back so that it fits around your light fixture. 


The last pumpkin craft that I made is to make a pumpkin head candlestick.  I found a black pillar candlestick  at the Dollar Tree and glue it to the bottom of the pumpkin.  I also added a gem spider from the Halloween party section. 


If you order from DollarTree.com, they are offering Free Shipping up to $50 through Sept 7th with the code FREESHIP.   If available you can also have items shipped free to your local store!

Happy Crafting! 


Read More »

Thursday, November 2, 2023

Our Halloween Night and Halloween Dollar Tree DIYS


 Did you have a nice Halloween?  We had a very busy weekend with birthdays, Halloween activities, and visiting with friends and family.   

Tuesday night was Trick or Treat night where I live. I have been making DIYs with Dollar Tree supplies for the last several weeks. I did not have a chance to post about my large friends  standing behind me on my porch yet, because I just finished the witch the night before.   


I put out this Welcome Trick or Treaters sign from the Dollar Tree Plus section. I had a few other signs as well, but I did not put them out because it was snowing out, and didn't want to risk them getting ruined. 


I made pumpkin lanterns using candy pails from Walmart and push lights. I glued on two sets of witch feet, and a witch hat on the sitting pumpkin.  On the the other pumpkin I glued on a Dollar Tree candlestick and gem spider.   You can see more on how I made them in this post here.


I made this hanging lantern with a  Walmart candy pail, Dollar Tree garden chain, and a strobe light. It looked really cool greeting all the Trick or Treaters. 


You can see a little more on how I made the giant porch monsters in the second photo.  For the legs, I rolled and zipped tied black foam board.  They legs were then glued onto a pizza pan.  

Underneath the poster board I used three laundry baskets and zipped tied them together in this formation. While I did have these on the porch to greet the trick or treaters, they were not super sturdy with the wind.  I sat in a chair right in front of them to keep them in place.  My Christmas version of this craft will stay indoors. 


I loved how my spooky pool noodle candles turned out.  I will definitely be making these again for Christmas, but with red and white pool noodles. You can see more about how I made them here.


I think one of my favorite Halloween DIYs this season was the my light up ghosts using all Dollar Tree items.  I would have liked to put them outside on Halloween, but didn't because of the cold and windy weather.  I shared more on how to make the ghosts on this post here.


Read More »

Thursday, October 19, 2023

Halloween Pool Noodle Candles DIY


This is the first time I have attempted to try to make pool noodle candles.  Since it is Halloween time, I wanted to make them spooky candles.  


** This post also contains affiliate links and I will be compensated if you make a purchase after clicking on my links.

I used one pool noodle and cut it into 8 pieces of various sizes, a pizza pan, battery tea lights, and a glue gun.  When decorating my candles I also used some black roses and Dahlias.  All of the supplies came from the Dollar Tree

\

I arranged the noodles until I liked how they looked on the pan, before hot gluing them in place.  


I then used the hot glue to make drips on the noodles to make it  look like candle wax. 


PRO TIP - if you have a duel temp glue gun make the drips with the LOW SETTING.  Thankfully I started with the two smallest candles, because I had my glue gun on high. Oops! I may have melted them a bit.  It's okay though, they will be hidden with the flowers later. 


I used black paint to cover the glue drips. I only had white tea lights, so I also painted the top half black as well.  I have seen some people use spray paint for this step. I did not have any on hand,  so I used acrylic paint, 


Since the tea lights  will fit into the pool noodles, I did not need to paint the bottom half.  


Once the candles were done, it was time to decorate the pan. 


I glued on two large black Dahlias, and a black rose bundle from the Dollar Tree . I would have use more rose bundles, but I only found one. I took apart the rose bundle, and with the Dahlias I had enough flowers to cover the entire pan.  


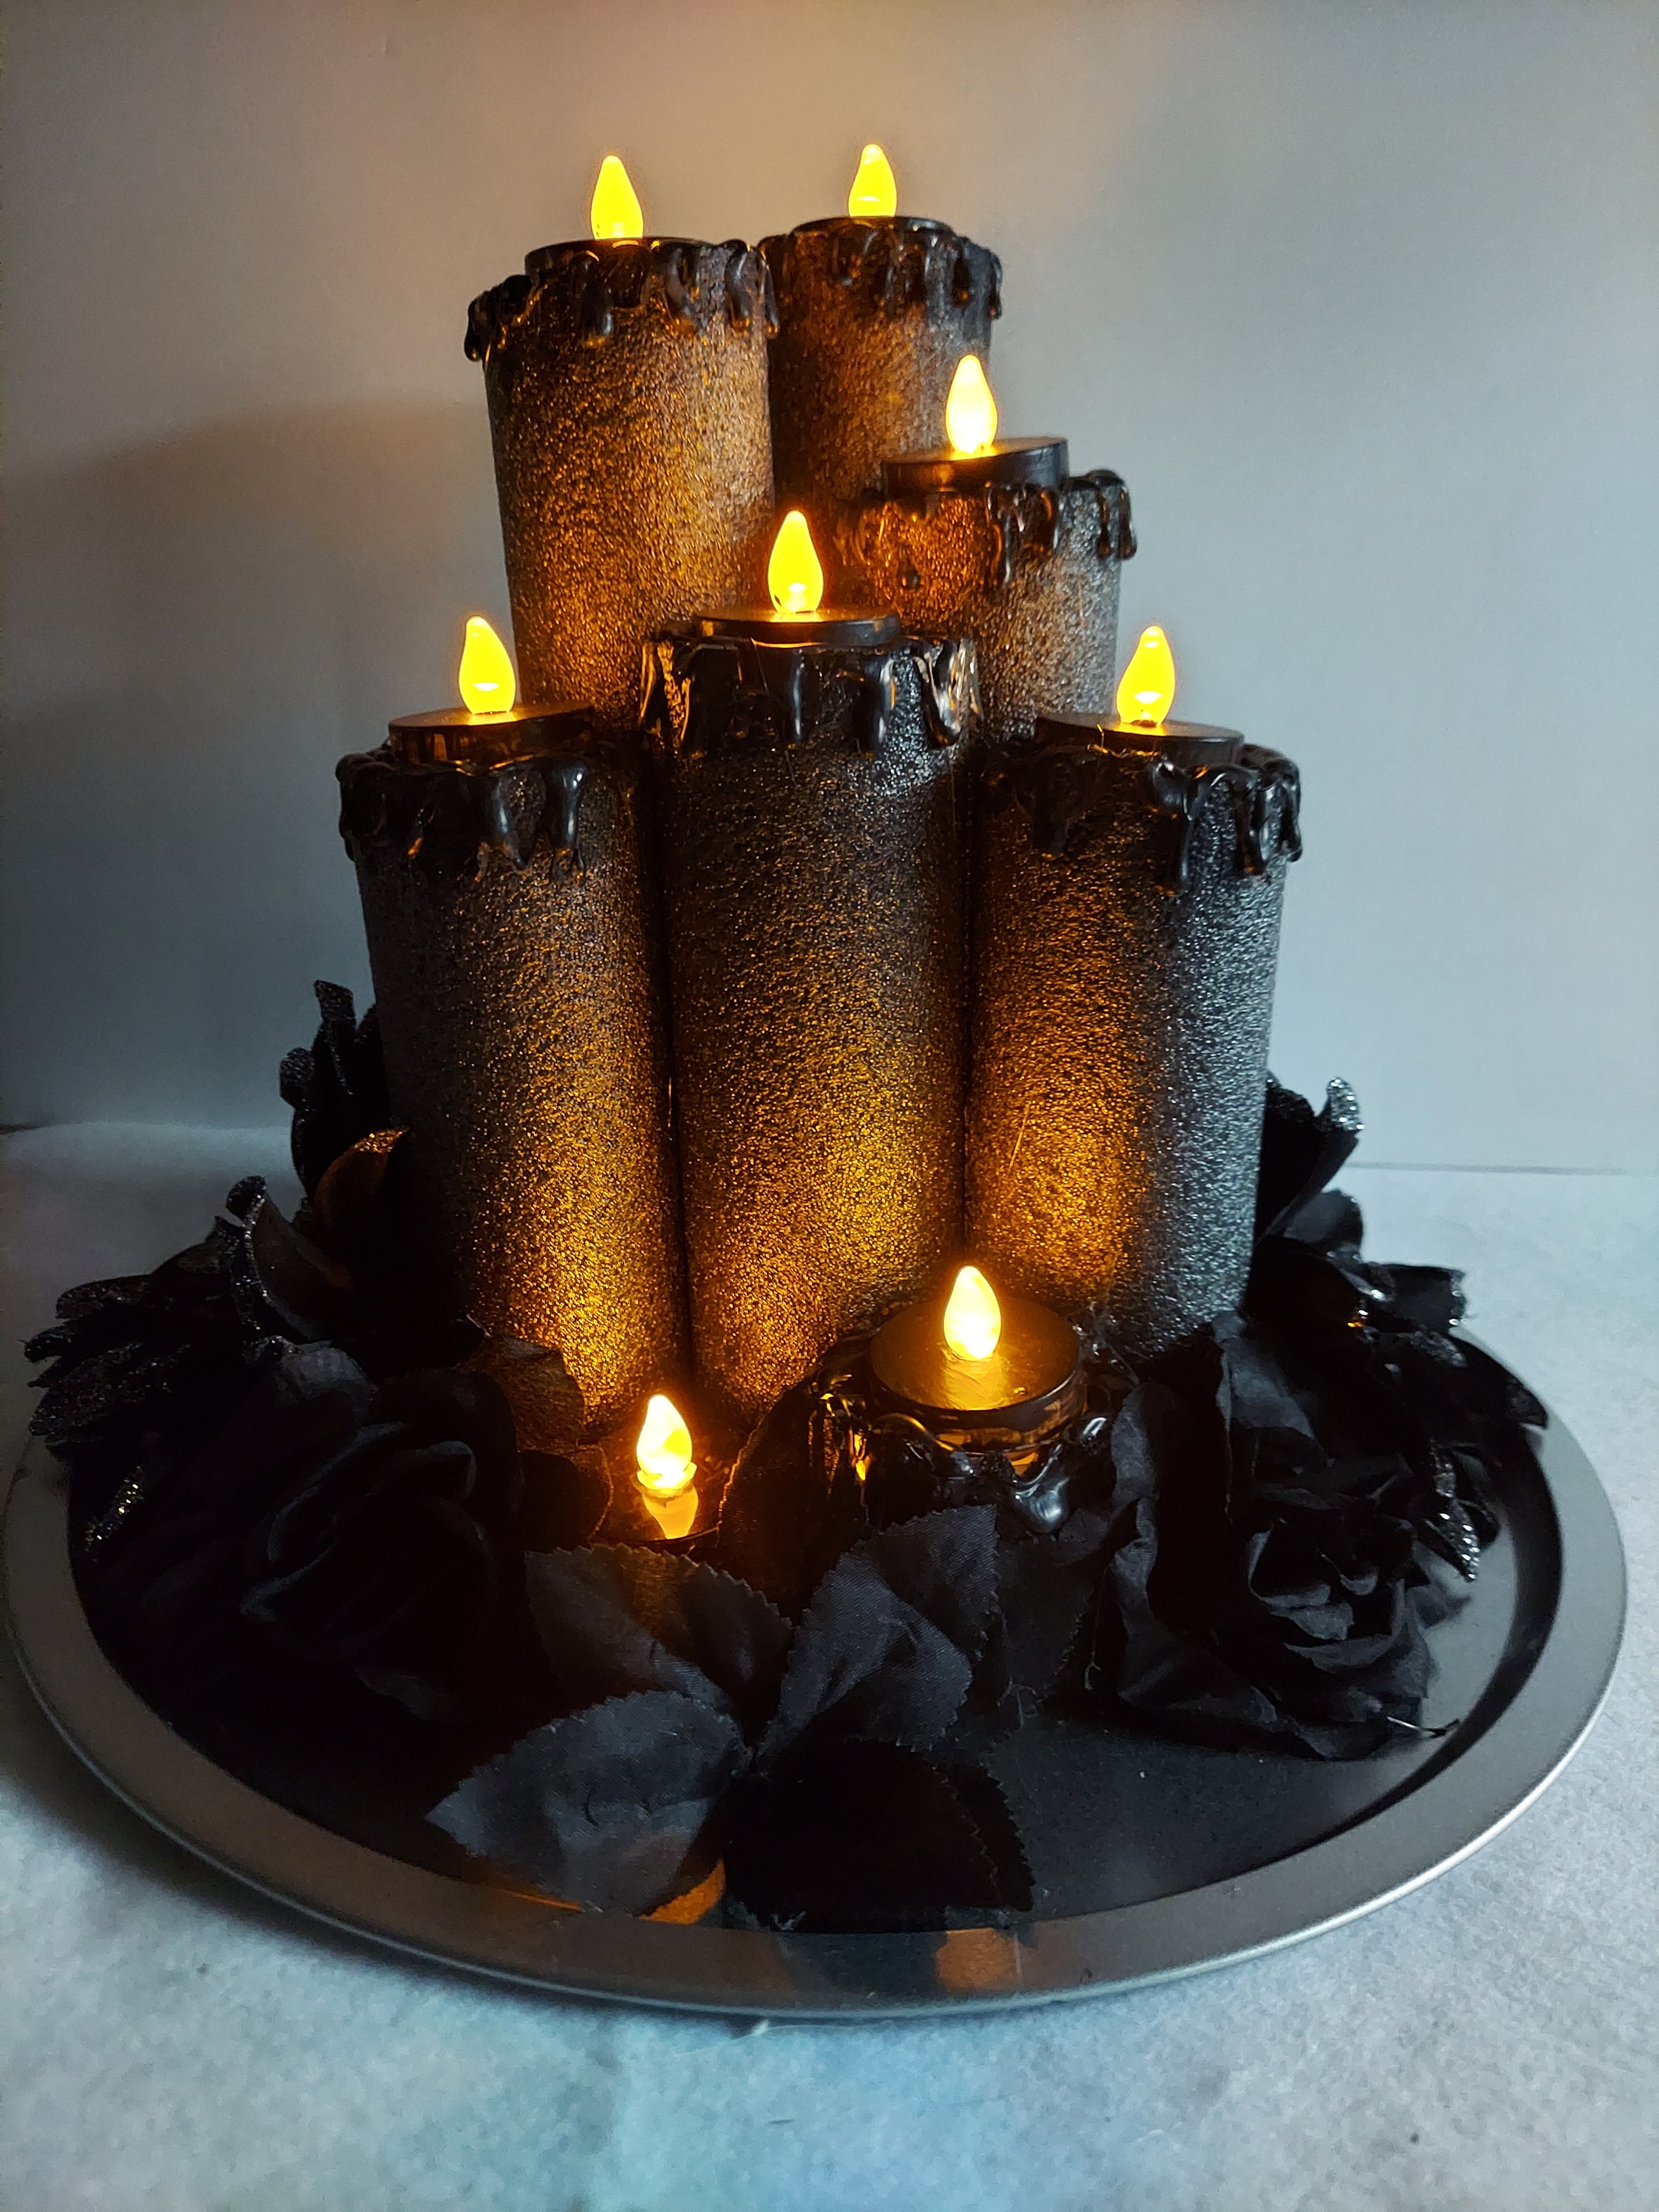
I LOVE how my pool noodle candles turned out. It was so easy to make.  I am now planning on making a white candles for Christmas, and decorating them with Christmas flowers.  
 

Read More »

Monday, October 16, 2023

Easy Pumpkin Pail Crafts


Did you know that those inexpensive  Halloween candy pails, actually can be used for many things and not just to collect candy. 

This past weekend, I used some of those pails to decorate our front porch. 


** This post also contains affiliate links and I will be compensated if you make a purchase after clicking on my links.

I think this pumpkin witch is my favorite. In addition to a pumpkin you  will need a couple of items that can be found at the Dollar Tree


You will need two sets of hanging witch legs, and a witch hat. 


Since they only sell with legs at the Dollar Tree, and not witch arms, we will have to alter one of the set of legs. 


The legs are sold hanging on a ring.  Cut the legs off the ring at your desired length for your pumpkin witch. I left my witch legs on the longer side. 


To give the legs some dimension, I stuffed each one with a plastic bag. (I have plenty of Dollar Tree bags from shopping there so much. LOL)  


It is pretty easy to make the hands.  I cut a hand shape out of the felt shoes.


Once all for limbs were stuffed, I hot glued them to the sides and bottom of the pumpkin. 


The last step is also pretty easy. Cut off the plastic handle, because we will not be needing it.  Place hot glue around 1/2 to 2/3 of the rim of the pumpkin. The reason why you do not put it around the entire rim is you want to leave enough space under the hat so you can place a light inside, and be able to turn it on and off.  


I left the unglued portion at the back of the hat.  


Another really easy craft is to turn one of the pumpkins into a hanging lantern.  


The first step is to cut off the plastic handle. I made the hole a little bit bigger, so I could add a hanging plant chain.  I found the chain in the garden section of the Dollar Tree.  


The chain actually had three hanging pieces to hang plants.  Since I only needed two pieces for the two holes, I removed the third piece. I am saving it in case I need it for something else later.  


I originally used a flameless candle as my light source but I wanted it a bit brighter, so I put in a push light from the electronics aisle. 


The last craft is my pumpkin votive. I was recording these crafts for a reel, and realized after I was finished that I did not have still photos to post on the blog from when I was making it.  I glued the pumpkin and a gem spider onto a black candlestick you can sometimes find in the candle aisle. I placed a flameless candle inside the pumpkin.  If you would like to see a video, you can see it on my Instagram here.


While we will still have more decorating to do before trick or treat night, being greeted by all the smiling pumpkins on our porch makes me happy. 

Read More »