Showing posts with label Christmas Crafts. Show all posts

Wednesday, December 14, 2022

Countdown to Christmas - Easy Ball Ornament DIYs


When we got some of my Christmas boxes out of storage the other day, I found some of my items I have not seen in awhile. I did not have space to use them in my apartment, but I was not ready to get rid of them either. It has literally been just like Christmas (LOL!!)  opening the boxes and finding the treasures that are inside them. 


The Christmas before moving from my house to an apartment, I did a craft show. In the boxes from storage, I found several ornaments that I had made for the show. When I was looking through them, I thought they would make a great Christmas countdown DIY post.  They are easy to make, and would make great gifts.

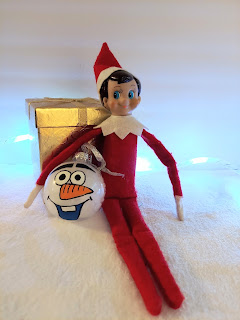
Buddy was very happy I found his favorite elf inspired ornaments again.  It's been awhile since he had seen them. You can see them in this post, Elf on the Shelf Ideas and Dollar Tree accessories.


It is a dreary, overcast day here in Ohio, so it was hard to get good photos.  I tried to use different types of lights, but since these ornaments are glass, I kept getting weird reflections.  

**these are affiliate links 

If you would try to make these ornaments yourself, the Dollar Tree has clear plastic ornaments in a 2 pack of smaller ornaments, a 4 inch, and a larger 5 inch ball.


The first thing I did with this ornament was fill it half way with faux snow. I then took a thin paintbrush, and painted on white birch trees and a few cardinals.  I also added a red ribbon to hang it on the tree.  I now have them on my Woodland themed Christmas tree.


This melted snowman ornament is very easy to make.  I pulled up my original photo from 2012, because you could see it better than the ones I took today. In my original ornament, I used craft foam for the nose, eyes, and buttons.  In the updated version, I used a little bit of orange air dry clay to make the carrot nose. I then used peppercorns for the rest, because they look more like tiny pieces of coal.  In both, I used a small piece of red felt fringed on the ends for the scarf. Fill the half full with faux snow before added the snowman pieces.  


All you need to make the elf inspired ornaments are some red ball ornaments like these currently available at Dollar Tree in small quantities, and a wooden or paper mache stocking.  Paint them red, and add white felt. 

e


When we had the craft show, the movie Frozen was still very popular.  At the show we sold a lot of snow wands, a few tulle skirts in Anna and Elsa colors, and these hand painted Olaf ornaments  I filled the ornament completely full with faux snow and then painted Olaf's face. If you prefer not to paint it, you might be able to make an Olaf face using a Cricut machine. 


I also sold hand painted Christmas Tree ornaments.  If you would like to see how to paint one of your own, here is my step by step tutorial from a post in 2013.  It is easier to do than you think! 


I recently had someone email me asking me about this  ornament.  I looked through the entire blog (11 years worth) looking for it.  I could not find a post, nor did I remember making it. Fast forward to a week later, I find the box of forgotten ornaments.  Now I understand why I could not remember it, they have been in storage since 2015. 😀 This Santa themed ornament is very easy to make.  I filled the ornament with red metallic basket filler. The belt is make from a strip of faux leather, which you can now find in the Crafters Square aisle of Dollar Tree. Santa's belt buckle is a rhinestone that had been glued on with hot glue. 


While looking for older pictures, I found a BONUS ornament. 


This ornament is probably still packed away with some Christmas decorations we did not get out yet.  I added blue glitter to the faux snow and painted on some snow paint on top that looked like real snow when it dried.  It turned out so pretty.  

Happy Crafting! 


Read More »

Monday, December 12, 2022

Countdown to Christmas - Christmas Treat Jars


As you know I moved recently.  I had been living in an apartment so I had several boxes in storage that I had not seen in awhile.  One positive side of moving is that you find things you forgot you had because you have not seen them in awhile.  

One of those things are these fun Christmas treat jars that I made.  They are an easy DIY, and can be used for many things.  

They can fill these with treats and give as gifts.  Add a battery powered tea light, and use as decor.  Another option is to use them in the kitchen or at a party and an utensil holder.  

I found these jars at Michaels a few years ago.  I am not sure if the glass version is still available, but I did find a plastic green version, and also a red version on their website online.


I had my elf Buddy pose with the elf jar. It would be a fun gift from your elf filled with treats to be eaten while watching Elf.  


I made the Santa jar, but adding a notched felt collar.  The belt is made with a strip of faux leather and two rhinestones. 


Mrs. Claus's felt collar is more rounded, and she has two white buttons. 


The elf jar has a yellow felt collar, and two yellow buttons.  

How would you use these jars? Let me know in the comments.  

**  this is an affiliate link 


Do you have more than on elf? For several years, we only had Buddy. Then one day I found some cute elves on sale, and Joy joined our family.  I am seriously thinking of adding an elf baby or two.  It would be a lot of fun having the entire elf family involved in their Christmas fun.  I found these Elf baby twins that are currently on sale for under $10.  If you have been thinking of adding to your elf family, go check them out   


Read More »

Friday, December 2, 2022

Dare to Share Saturday

It is Friday night, and you know what that means.. 
It is time to Dare to Share! 

Happy December!  Have you decorated yet?  We have done a little bit of decorating, but still have a lot to do.  I have a mini tree up in the bedroom, and a few things here and there.  Part of the reason why things are not up yet, is I am with someone who likes to wait until December to decorate. This year I was in the spirit early, but I need his help to get out all the decorations out of the crawl space. Hopefully by this time next week, it will be a little more festive around here. 


This week I continued the Countdown to Christmas series.  A few years ago my Snow Owl Ornaments went viral. In this week's post I re-shared how to make them and shared a few gift ideas for the crafter in your life. 


 On Tuesday I shared this Christmas treat Reeses Cup Reindeer.  I also shared some gift ideas for Christmas baking.  


On Wednesday I shared a craft idea to make with your kids, a homemade Advent calendar that can be filled with daily candy or toys.   I also shared some kids advent kits filled with Marvel, Disney and fidget toys.


I found out yesterday morning, that December 1st is National Pie Day.  I shared an Easy Chocolate Banana Pie, that would be great for you holiday get togethers.  I also share a few travel carriers to transport your pies when going to a pot luck or party. 

Over on my Etsy Shop, I have listed some new treat bag toppers this week. In my shop I also have Christmas Trivia, Christmas Riddles for kids, Letters from Santa, and moreThis weekend I am posting  Elf Activity Cards that your elf can give your kids with several Christmas activities that the whole family can do.  I will also be adding a Christmas Scavenger Hunt in the next few days.   

Now it is your turn to share.  I would love for you to share what you are up to.  

Link up and HAVE FUN! 


You are invited to the Inlinkz link party!

Click here to enter
Read More »

Wednesday, November 30, 2022

Countdown to Christmas - Homemade Advent Calendar


 When my kids were younger, we decided to make an advent calendar.   We brainstormed a bit, and looked at our craft supplies.  We had been collecting cardboard tubes for crafting and thought they would be perfect for holding treats.


We painted the tubes in white, red and green, and numbered them with coordinating number stickers.  We stapled the bottom to make a little pouch.  If you do not have 24 tubes, you can use 12 and make them double sided.  After you add the numbers they are easy to embellish more.  We added stickers on each of ours. 

** this post has affiliate links 


We had an inner office door that had glass panes. We hung them on that door and then placed candy treats in each of the pouches.    Other options could be to add some ribbon and hang on the Christmas tree or garland.    An idea I had for this year it to make some that are Elf themed and have our Christmas elves Buddy and Joy bring one day. 

I am currently making Advent and Elf activity cards for my shop, which will be added this week.  The cards would fit inside the tubes with a different Christmas themed activity you could do that day.  I will be posting the link here as soon as it is up.  

If you would prefer to buy an Advent Calendar than to make one, I found some really cute ones online.  


If you love Marvel, this Marvel Pop! has a different characters in  each day of the month.  At the end of the month you would have a entire mini Marvel army to play with. 


 If you are a Disney fan, they have a  Funko Disney Character Advent Calendar


So many kids (and adults)  love fidget toys, they even have a Daily Fidget Toy Calendar, where each day you would get a new fidget toy.    They all look like fun except for the mini skateboards.  LOL I frequently had to temporarily take them away in class when my 6th graders got disruptive during the lesson.   If you make an homemade version of an advent calendar and want to add your own fidget toys, definitely check out the toy aisle at the Dollar Tree, they have lot of fidget toys. 


I wish they had this 5th generation Echo Dot for Kids when my kids were younger.  There are so many things you can do with this.  It will play songs, games and even help with their homework.  You will give a 1 year subscription to Amazon Kids Plus, and it has parental controls.  The kids can decide if they prefer this owl with owl voice, or turn it into a dragon with a dragon voice.  Definitely go check it out online, there is a lot cool features and a 2 year worry free guarantee. 


Read More »

Friday, November 25, 2022

Countdown to Christmas - DIY Christmas Fireplace Mantle


 When we had to move from our house with a fireplace to an apartment in 2015, we had to adjust to a change to our traditions. One of those traditions was hanging our stocking on the mantle for Christmas Eve.  We wanted to continue our traditions as much as possible so I decided to DIY a mantle. 


Since we had just moved a few months before, we still have some moving boxes on hand. I used for small size moving boxes (16 x 12 x 12) from Lowes to make the sides of the fireplace.  I taped them shut so that the sides were even. 


** this post contains affiliate links 


I wanted to make my fireplace red, and since it was December in Michigan and I did not have enough room to paint indoors, I had to improvise again. I bought two rolls of plain red paper from the Dollar Tree.   I wrapped them individually with the paper and stacked them back together. 


There are a couple of ways to make the bricks.  One way is to use a square sponge in white paint. I was making our mantle kind of last minute, and knew waiting for paint would take longer than I had. I decided to use a roll of masking tape to make the lines.  I tried to line the tape up as straight as possible, but as you can see in the picture didn't measure between each line.  Uneven bricks give your fireplace more character, yea, let's go with that.  LOL! 


I took smaller lines of tape, and lined up bricks on all visible sides.  


Next I needed to figure out what to use as a mantel. I decided on a Dollar Tree foam board, though you could use a piece of wood if desired.  The foam board  was lightweight enough to sit on the cardboard boxes. I did have to trim them a little bit for the best fit.  One piece is a bit thin, so you can double up and use two of them.  


I used small command hooks to hang the stockings.  I put them on the top of the foam boards with the hooks close to the edge. For a more cozy feel, I covered the mantle with my favorite woodland Christmas blanket.  Buddy and Joy thought it was a nice spot to have a little Christmas snuggle. 

While it was not the big wooden fireplace that I was used to, it was an inexpensive alternative that only took a few dollars and a few hours to make. 


Have you been doing any Black Friday shopping today? 

If you shop online or in store, make sure you use Rakuten to save a lot of money.  You can currently get up to 12 % cash back on your  purchases that you are already making anyway, so some extra cash is a nice bonus.   To get back money for your in store purchases.  Open the app on your phone, find the store and pay with your linked card (like Ibotta). If shopping online, find the store you are buying from on Rakuten app or site, before making your purchase. You will receive your cash back shortly at after. 

 If you do not have Rakuten yet, you can sign up here.

Today is definitely a good time to check out Amazon  you are in the market for a new computer.  They have many great deals today.


Read More »

Thursday, December 3, 2020

Red Truck Christmas Crafts


I have been wanting to work on this craft for several weeks, but I have been so busy with school, that I did not have a chance until this past weekend.  As you may know from my blog and Instagram posts, I love anything red truck.  When I was able to find a few of the wooden trucks at the Dollar Tree, I knew exactly what I wanted to do with them.  

** This post also contains affiliate links and I will be compensated if you make a purchase after clicking on my links.


I started this project with two DIY wooden Christmas Trucks , a piece of pallet wood from the Crafter Square aisle, and a package of the Christmas trees from the Cobblestone Christmas Village.  I forgot to take a picture of the pallet before I painted it. As you can see I painted it dark brown.  

Added: New in 2021 Dollar Tree has added a few new trucks to their inventory  a paintable MDF truck, and this wooden truck with Christmas tree and trailer

An alternative to the pallet wood, is the wooden rectangular crate, which is available online in small quantities. 


Since I wanted to make a double sided 3D truck and the wooden trucks had doors on the same side, I had to remove the extra pieces and glue them on the opposite side of one of the trucks.  The pieces are glued on pretty well with wood glue, so they were not super easy to remove. I did slightly damage the door, but it gives the truck some charm and will be on the back side of the truck. I painted both of the truck pieces the same on both sides and added details.  You will see in one of my later pics how I added extra details like shading and snow, but I don't have a picture of it at this step. 


Using a bit of hot glue, I glued the pallet to the back side of one of the trucks.  This will be the truck bed where you will place the Christmas trees. 


To make my truck stand up, I added hot glue to the second side of the pallet and then attached the second truck while holding them upright. I wanted to make sure they were lined up evenly. 


After deciding where to place on the pallet, I decided to glue them down.  This step is completely optional.  I am considering picking up another package of the trees and adding a few more.  I really loved how the truck turned out but I thought it was missing a little something. 


I remembered that I had found these mini ornaments for only $1.88.  I believe they are from Walmart.  The Farm Fresh Trees ornament  was the perfect size for the door of the truck. 


I hot glued the ornament to the truck, and it finished the look.  I love how this turned out.  I think it will look cool on a white snow blanket with a few other trees around it. I am still in the process of getting out my Christmas decorations.  Hopefully once I get everything out, I will add it to Instagram. 


Another red truck craft I made were these wooden ornaments for my red truck themed Christmas tree.  I found them in the Christmas craft aisle at the Dollar tree.  As with the large wooden truck.  I painted them all the same, and then added the details on the truck and snow on the tree. I painted them on both sides, so they could face in either direction when on the tree.  


I used jute twine to make the loop to hang them on the tree, but I wanted to add just a little more.  I bought this amazing Christmas ribbon tower from Walmart for only $4.88. (only .82 per roll!)   I love all the ribbon that is included in this set. I decided on the buffalo check trees to make little bows to tie on the jute twine. 


Here are what the final ornaments look like.  I just love them and how they look on the tree. 

Added: If you prefer not to paint red trucks, DollarTree.com has this  version of the red truck ornament available online in small quantities. 


I just love my red truck tree. I seriously can not stop looking at it. It is in the corner of my bedroom, and makes me smile every time I see it.  You can see one of the ornaments in the bottom picture. I added a camper ornament behind it that I also found at the dollar tree.  

I have a few more red truck crafts to complete that I will be adding soon! 


Read More »